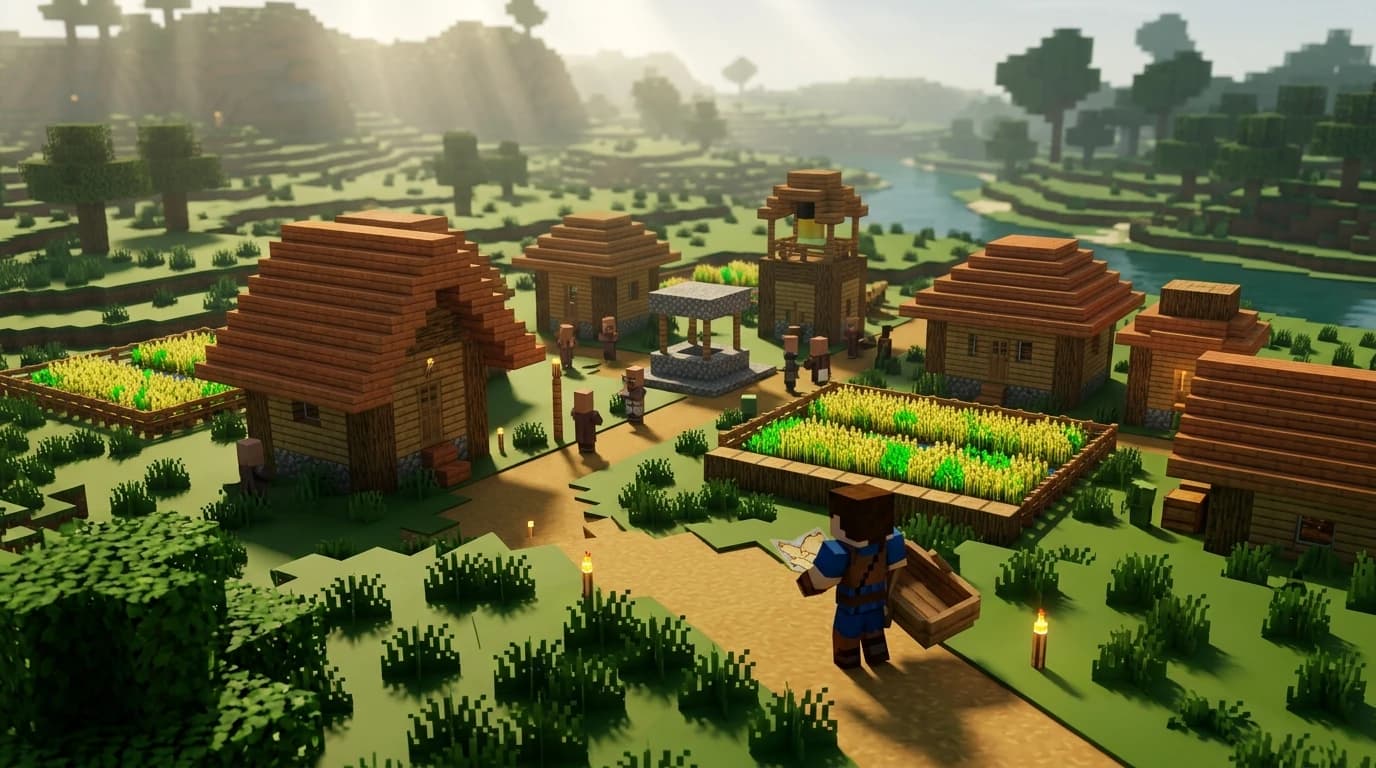
To answer how do you find a village in Minecraft, search plains, desert, savanna, taiga, snowy plains, snowy taiga, or meadow biomes and scan the horizon for houses, farms, paths, and a bell. With cheats enabled, use /locate structure village to get the nearest village coordinates. You can also use a village seed or build one from villagers.
How do you find a village in Minecraft without cheats?
The most reliable survival method is to travel through biomes where villages naturally generate. Villages are easier to spot in open terrain, so prioritize flat plains and deserts before heavily forested areas.
- Plains: the easiest village type to see from a distance because the terrain is open.
- Desert: sandstone buildings stand out against sand, but bring food and water supplies.
- Savanna: acacia houses often generate across hills and plateaus.
- Taiga: spruce buildings can blend into dense forests, so climb hills and check clearings.
- Snowy plains and snowy taiga: look for spruce houses, farms, paths, and lanterns in white terrain.
- Meadow: villages can generate in open highland areas, although steep terrain may hide parts of them.
Villages do not naturally generate in swamps, jungles, forests, badlands, or mountains simply because those biomes are nearby. A village may cross a biome border, so check the edges of plains, deserts, and savannas rather than stopping when the terrain changes.
Use a search pattern
- Climb the highest nearby hill, mountain, or tree.
- Look for straight paths, farmland, roofs, smoke from campfires, iron golems, villagers, or a village bell.
- Travel in one direction instead of wandering randomly.
- Mark your route with torches, blocks, or coordinates so you can return to your base.
- Search open areas first, then follow rivers and coastlines toward another suitable biome.
Boats are especially useful when villages are separated by oceans or rivers. A boat lets you cover long distances quickly and can transport villagers after you find the settlement.
Where to look for villages
Villages are generated structures, so they are not placed in every suitable biome. You may search a large plains biome and still find nothing because the world generation did not place a village there.
Look for signs that you are in or near a village area:
- Large rectangular crop fields with water channels.
- Path blocks forming lines across grass, sand, or snow.
- Wood, sandstone, cobblestone, or terracotta buildings.
- Villagers walking between beds and job-site blocks.
- An iron golem protecting the settlement.
- A bell mounted near a central meeting area.
When exploring from spawn, travel across the surface during the day and sleep at night. Keep extra food, a bed, a shield, a boat, and a stack of blocks. If you find a village, record its X and Z coordinates immediately using the debug screen on Java Edition or the coordinates setting on Bedrock Edition.
How to find the nearest village with commands
The fastest method uses the /locate command, but commands or cheats must be enabled. Enabling cheats can affect achievements or trophies depending on the edition and world settings.
Java Edition command
Open chat and enter:
/locate structure #village
This searches for the nearest structure in the village tag. You can also use /locate structure village when supported by your current version. The game returns coordinates in chat. Click the coordinates if your interface allows it, or travel toward them manually.
Bedrock Edition command
Open chat and enter:
/locate structure village
Bedrock Edition returns the coordinates of a nearby village if one exists in the current dimension. Use the returned X and Z values to navigate with a map, coordinates, or teleportation.
Teleport to the result
After locating the structure, you can teleport directly if cheats are enabled:
/tp @s X Y Z
Replace X, Y, and Z with the coordinates shown by the locate command. If the command provides only horizontal coordinates, use a safe height such as Y 100, then descend carefully. Teleporting directly into a wall, cave, or lava pocket can cause damage, so inspect the destination before moving.
How to use a seed to find a village
A world seed controls terrain and structure placement. If you use a seed that has been tested for a village near spawn, create the world with the matching edition, version, and seed value.
- Open the world-creation screen.
- Find the seed field or advanced world settings.
- Enter the complete seed, including a minus sign if it has one.
- Confirm whether the seed is for Java Edition or Bedrock Edition.
- Use the same major game version used when the seed was tested.
- Create the world and check the listed spawn coordinates or nearby biome.
A seed is not guaranteed to work across editions. Java and Bedrock generate structures differently, and terrain can change after updates. If a seed does not match, check the edition, version, seed digits, and whether the listed coordinates use X and Z in the same order.
You can also enter your own seed and use a seed map or structure finder outside the game. Select the correct edition and version, enter the seed, and check the village markers near your spawn. This is useful when you want a village without turning on cheats in the world itself.
How to build a village in Minecraft
Vanilla Minecraft does not have a craftable village block. You create a working village by bringing villagers to a safe area and giving them beds. A bell is useful for a meeting point, but it is not required to make villagers breed or to establish the settlement.
Build the settlement
- Choose a flat, well-lit location near your base.
- Build houses or enclosed rooms with roofs, doors, and enough space to move.
- Place at least two unclaimed beds where villagers can reach them.
- Add torches, lanterns, fences, or walls to keep hostile mobs outside.
- Place job-site blocks such as a lectern, composter, blast furnace, or smithing table if you want villagers to take professions.
- Add a bell if you want a visible gathering point and a more traditional village layout.
A bed is the important starting point for a player-made village. Villagers recognize beds and other points of interest, so leave clear paths and avoid placing beds behind blocks they cannot reach.
Bring in villagers
The easiest options are transporting villagers from an existing village by boat or minecart, or curing two zombie villagers. For a boat transfer, place the boat beside a villager, push the villager into it, then travel across land and water toward the new settlement. Rails and powered minecarts are better for long overland routes.
To cure a zombie villager, use a splash potion of weakness and then a golden apple. Protect the zombie villager from sunlight and hostile mobs while the conversion completes. Once cured, move the villager into your prepared settlement.
How to repopulate a village
To repopulate an empty village, you need at least two villagers, reachable beds, and enough food. Existing houses are not required; a secure breeder inside your own buildings works just as well.
- Place extra beds with an open block above each bed.
- Give villagers food such as bread, carrots, potatoes, or beetroots.
- Make sure villagers can reach the beds and move around safely.
- Protect the area from zombies, drowned, raids, and accidental falls.
- Add more beds than the current villager count so babies have somewhere to sleep.
Farmers can help supply food when they have access to crops and a composter. You can also throw food directly at villagers. When villagers have enough food and an available bed exists, they can produce baby villagers. Baby villagers grow into adults after roughly 20 minutes of real time.
If breeding stops, check for unclaimed beds, blocked access, missing food, or villagers linked to beds elsewhere. Remove stray beds and workstations outside the intended settlement, then place the beds again where villagers can reach them.
Java Edition and Bedrock Edition differences
The basic exploration method is the same in both editions: search village-generating biomes, use a seed made for the correct edition, or use the locate command with cheats. The main practical difference is command syntax and structure generation.
- Java Edition: use /locate structure #village or the supported village structure name.
- Bedrock Edition: use /locate structure village.
- Seeds: a village at particular coordinates in Java may not appear at the same coordinates in Bedrock.
- Villager mechanics: breeding and bed access work similarly, but some villager behavior and trading details can differ between editions.
On consoles, the game usually runs Bedrock Edition, so use the Bedrock command and Bedrock seed information. PC players may use either Java or Bedrock, so verify the edition before copying a command or seed.
Common mistakes when searching for a village
- Searching in a swamp: swamps are not normal village-generation biomes. Search nearby plains, savanna, desert, taiga, snowy plains, snowy taiga, or meadow areas instead.
- Using the wrong seed edition: Java and Bedrock structure locations often differ.
- Ignoring coordinates: record the village location before exploring farther.
- Assuming every plains biome has a village: suitable biomes can generate without a village.
- Leaving villagers unprotected: zombies can kill villagers, and raids can damage an unsecured settlement.
- Breaking beds and workstations randomly: villagers may lose their links or claim nearby points of interest instead.
If you want the quickest legitimate survival route, search from a high point through plains and desert biomes, follow rivers with a boat, and mark every promising location. If you need a village immediately, use the locate command in a test world or start with a verified seed, then transport villagers to your preferred base.