To answer how do you make a brewing stand in minecraft, place 1 blaze rod in the center slot of a crafting table and 3 cobblestone, blackstone, or other compatible stone-tier blocks across the bottom row. Craft the stand, place it, add blaze powder as fuel, then use water bottles and potion ingredients to brew.
What you need to craft a brewing stand
The recipe is simple, but the blaze rod means you must reach the Nether before you can craft a brewing stand. Blazes appear in Nether fortresses and can drop blaze rods when defeated. You need only one rod for the stand, although extra rods are useful because they can become blaze powder for fuel.
- 1 blaze rod
- 3 cobblestone or other compatible stone-tier blocks
- 1 crafting table
You can also find brewing stands in some generated structures, including village churches, igloo basements, and end ships. A found stand still requires blaze powder before it can brew in the normal way. ([minecraft.net](https://www.minecraft.net/ja-jp/article/taking-inventory--brewing-stand?utm_source=openai))
How do you make a brewing stand in minecraft?
Craft the stand in a crafting table
- Open a crafting table to access the 3-by-3 crafting grid.
- Place 1 blaze rod in the center slot of the top row.
- Place 3 cobblestone blocks across the entire bottom row.
- Move the brewing stand from the result slot into your inventory.
The three stone blocks can be used together in the same recipe. You are not limited to regular cobblestone if you have another accepted stone-tier block available. The finished recipe creates 1 brewing stand. ([minecraft.net](https://www.minecraft.net/sv-se/article/meet-blaze?utm_source=openai))
| Ingredient | Quantity | Crafting-grid position |
|---|---|---|
| Blaze rod | 1 | Center slot of the top row |
| Cobblestone or compatible stone-tier block | 3 | All three slots in the bottom row |
How to place and open the brewing stand
Put the brewing stand on a solid surface where you can reach it easily. Select it in your hotbar, aim at the block where you want it, and use the place action. On PC, this is normally right-click. On console, use the button assigned to placing or using a block.
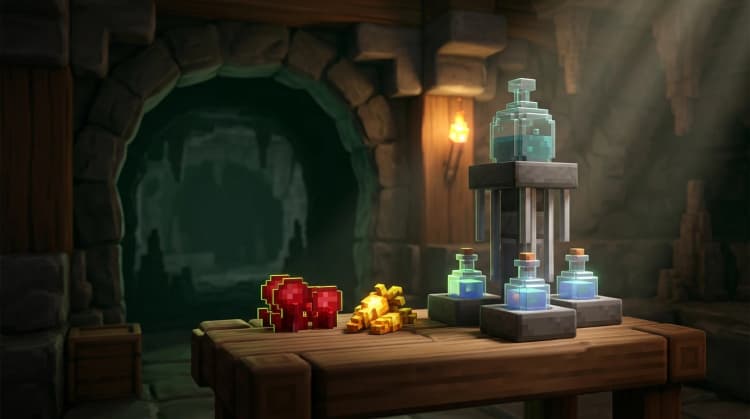
Use the placed stand again to open its brewing interface. You will see three bottle slots along the bottom, an ingredient slot above them, and a fuel slot for blaze powder. The three bottle slots let you brew up to three matching potions during one brewing operation. ([minecraft.wiki](https://minecraft.wiki/w/Tutorial%3AAdvancement_guide/Nether_tab?utm_source=openai))
How to use a brewing stand in Minecraft
1. Add blaze powder
Turn a blaze rod into blaze powder by placing the rod in any crafting slot. Put the blaze powder in the fuel slot at the upper-left side of the brewing stand. One blaze powder provides enough fuel for up to 20 brewing operations, so it is worth carrying extra powder when you plan to make several potion batches. ([minecraft.net](https://www.minecraft.net/fr-ca/article/taking-inventory--blaze-powder?utm_source=openai))
2. Fill glass bottles with water
Craft glass bottles from 3 glass blocks, then use each empty bottle on a water source block or a filled cauldron. Place the water bottles in the three bottom slots of the brewing stand. You can use one, two, or three bottles, but using all three slots gives you more potions from the same ingredient.
3. Add a brewing ingredient
Place the ingredient for your desired potion in the top slot. For most useful potions, start with Nether wart. Nether wart changes water bottles into awkward potions, which are the base for many other recipes. A few recipes, including the Potion of Weakness, do not follow that usual starting step.
- Nether wart creates awkward potions.
- Gunpowder turns a regular potion into a splash potion.
- Redstone dust usually extends a potion’s duration.
- Glowstone dust usually increases a potion’s strength.
When the ingredient and bottles are compatible, the stand begins brewing automatically. Each brewing stage takes about 20 seconds. When the progress bar finishes, collect the potions from the bottom slots and add the next ingredient if the recipe requires another stage. ([minecraft.net](https://www.minecraft.net/en-us/article/health-minecraft?utm_source=openai))
What can you brew in a brewing stand?
A brewing stand creates drinkable potions, splash potions, and lingering potions. The exact result depends on the bottle type and ingredient order. A practical first brewing session is a batch of awkward potions followed by an effect ingredient.
- Awkward potion plus sugar creates a Potion of Swiftness.
- Awkward potion plus a glistering melon slice creates a Potion of Healing.
- Awkward potion plus a magma cream creates a Potion of Fire Resistance.
- Awkward potion plus a pufferfish creates a Potion of Water Breathing.
- Any regular potion plus gunpowder creates its splash version.
- Any regular potion plus dragon’s breath creates its lingering version.
After creating a base potion, modifiers can change how it works. Redstone dust can extend duration, while glowstone dust can make certain potions stronger. Do not add both automatically, because some potion recipes accept only one modifier or have different outcomes.
Where to get the ingredients
Blaze rods and blaze powder
Travel to the Nether and search for a Nether fortress. Defeat blazes there to obtain blaze rods, then craft the rods into blaze powder. Keep at least one rod for the brewing stand and reserve additional rods for fuel and other recipes.
Nether wart
Nether wart commonly appears in Nether fortress locations. Bring it home and grow it on soul sand so you can maintain a renewable supply. Nether wart does not need light to grow, and harvesting mature plants gives you more wart for future awkward potions.
Glass bottles and water
Smelt sand in a furnace to make glass. Arrange three glass blocks in a V shape in a crafting table to create three glass bottles. Fill them from a water source before opening the brewing stand.
Java Edition and Bedrock Edition differences
The brewing stand recipe and the basic brewing layout work the same way in current Java Edition and Bedrock Edition: use one blaze rod, three stone-tier blocks, blaze powder, water bottles, and ingredients. Both editions support three bottle slots and a separate ingredient slot.
The important block-breaking difference is that a brewing stand should be mined with a pickaxe. In Java Edition, breaking it without a pickaxe drops nothing, while Bedrock Edition can drop the stand without one. Using a pickaxe is the safe choice in either edition. ([minecraft.fandom.com](https://minecraft.fandom.com/wiki/Brewing_Stand?utm_source=openai))
Common brewing stand mistakes
- No brewing progress: Add blaze powder to the fuel slot. A blaze rod in your inventory is not the same as fuel already loaded into the stand.
- The recipe does not work: Check that the bottles are water bottles or valid potions and that the ingredient matches the intended recipe.
- You get fewer potions than expected: Use all three bottom slots before starting a batch.
- You cannot make the stand: You need a blaze rod, not blaze powder, for the crafting recipe.
- You lose a placed stand: Mine it with a pickaxe, especially in Java Edition.
The fastest reliable setup is one brewing stand, three glass bottles, a water source, blaze powder, Nether wart, and the effect ingredient you want. Keep the stand near storage so you can refill bottles and ingredients without interrupting your next potion batch.